Sunday, August 15, 2010

Look!

I am very excited!

Although I have been knitting for 50 years (my grandma taught me to knit and crochet early on) I am not a confident knitter.

Elvie, an expert knitter at the shop, picked out a pattern and directed me to this gorgeous yarn and I am working on this:

DSC01532

How does the yarn know when to change colors?????

For those of you that are not knitters, this type of knitting is called Entrelac.  It is much easier to do than to explain.  Each section is knitted separately yet everything is still on the needles together (I told you-clear as mud).  On my second start I got the rhythm and everything seemed to click.

I will keep you updated on my progress.

A New Sample

One of the pleasures of working at the quilt shop is the opportunity to try out patterns and make samples.  Here is a topper that I made last week:DSC01530

I can’t remember the last time I worked with 60 degree triangles and I was nervous about the binding but I was able to finish this up in just a few hours.  It is a pattern by Atkinson Designs-she also made up the Yellow Brick Road pattern.

Wednesday, August 11, 2010

One Month Old!

Posted by Picasa

Monday, August 9, 2010

Tuesday’s Tip August 10,2010

Here are a couple of tips to help you make a nice straight binding.  I know that many of you may do this but this is for those who are new to making a straight grain binding.

I cut my strips at 2 1/2” because I I attach the whole binding by machine.  No handwork for me! (OK-not totally true-some times I sew the binding to the back by hand-but not very often).

I used to think that I was saving fabric by butting my edges together exactly. (See below) But I think that is why my seams were never straight.

DSC01526

Now I use my cutting board and start like this:

DSC01345

By overlapping a bit, I find it is easier to visualize a start point and stop point for my drawn line.

I use my little ruler to mark my sewing line; the bias marking on the ruler is lined up at the bottom so I know I have a true 45 degree angle. Mark your sewing line.

DSC01346


DSC01347

(blurry-sorry)

OK-this is important. Check to make sure the line you drew is going the right way.  There is nothing worse that sewing 10 binding strips together the wrong way.DSC01348

Sew the seam.

DSC01527 

Trim the seam to 1/4” and trim the dog ears (the picture below shows one dog ear cut off)

DSC01528

And you are done! A nice straight binding.

DSC01529

Next week I will show you how I do the whole binding by machine.

Tuesday, August 3, 2010

Tuesday’s Tip August 1, 21010

August already!

I am working on a wall hanging for my sister-in-law.  It is from a series of patterns depicting kitties as food.  This one is The Stalker (for celery).

DSC01522

When I do machine applique I was taught to pull up my bobbin thread at the start, sew my seam, pull a long tail and cut the threads.  Then I pull the threads to the back and secure them.

Tedious yes but it makes for a neat finish and is still faster than hand applique.

DSC01523

I use these to pull my threads to the back.

DSC01525

They are self-threading needles.  What a time saver! I can thread two or three threads at a time. The tops of the needles have an opening; the thread slides through and is secure. I found these on the notions wall at Jo-Ann’s and the case is magnetic.I love it! They stick on the lamp attached to my cutting area so I always know where they are.

A caveat- I do not like them for regular hand sewing.  They are kind of thick and not as sharp as regular sharps. Maybe some other brands are better.  But for this type of work they are perfect.

Happy sewing!

Tuesday, July 27, 2010

Tuesday’s Tip July 27,2010

Mimi is visiting me this week. I turned her on to quilting a couple of years ago so we have been talking,sewing, talking, visiting quilt shops and talking.

Mimi moved to Virginia four years ago and just started meeting quilting friends.  She made the comment that a lot of her sewing is done in solitary.  That got me to thinking and evolved into today’s tip.

Join a group!  Having a group to sew with is a wonderful experience, even if only once a month.  You get to bounce around ideas, solve problems and get inspired.

Our local library has a few sewing groups meeting each month and all advertise that all are welcome. If you are so inclined, it is easy to start a group.  Reserve a room, put up a sign and see who shows up.

When my children were little I invited a few friends to my house. Some did cross stitch, some did mending or knitting, and some just talked while our children played. We ended up meeting once week, in different houses for over 2 years.

See if there is a local quilt guild. Most will allow you to visit once or twice before joining.

Many quilt shops have groups that meet weekly or monthly.  A small fee gets you a great space to lay out quilts, solve problems and meet new friends.

Even meeting with just one friend once or twice a month will inspire you to keep going. Sharing ideas and fabrics is a whole lot better-and cheaper- than the latest quilt magazine (ok-I still buy the magazines!)

Now, go quilt!

Thursday, July 22, 2010

More of Diane and Mike’s Excellent Adventure

While in Baltimore visiting Joe, Adrienne and Leonard, Michael and I did a couple of the touristy things. We went to Annapolis and visited the historic section.  No pictures there but I do have  picture filled details of all the food we ate!

We have to go to Ikea while in Maryland.  Why is there no Ikea in Syracuse??? One of there days I will go down with a truck and get everything I want. My husband and I did get lunch:DSC01491 DSC01492  

Fruit salad for me and Swedish meatballs for my husband.

Back at Joe and Adrienne’s the next day, we had a veritable feast.  For me (and Joe) , steamed shrimp and hard shelled crab.

Here is Joe patiently teaching me how to eat the crab:    

DSC01498DSC01502

Before…

DSC01497 

DSC01496

And after…

DSC01503

Adrienne and my husband opted for THIS:

DSC01494

It is a steak and cheese burrito (btw, they each ate one!)

No after picture-just a lot of moaning!

Tuesday, July 20, 2010

Tuesday’s Tip July 20, 2010

It   is   hot.   Consequently, sewing in my room is near impossible since the room is upstairs with no air conditioning.

So I have been doing some hand work which I can do downstairs in my family room with a fan blowing a gentle breeze.

I have been working on my 12 Days of Christmas blocks.DSC01506

I am on block two.

So here is a neat trick I learned from my embroidery friends at the library.  We meet twice a month-it is one of the rare times I see my next door neighbor.

I am doing the outline stitch but this trick also works on other stitches.  It was originally taught to me when I was working on a cross stitch project.

The pattern calls for two strands of floss.  Use only one strand but cut it twice as long as you normally use and fold it in half.

Here is the end with two strands.DSC01507

Here is the end with the fold.DSC01509

Thread your needle with the end with the two strands of thread. DSC01510

Start by putting the needle through from the back of your piece to the front.  Pull the thread up a ways.DSC01511
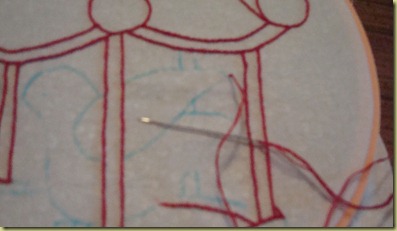
Now make a stitch going back down.  On the back of your work you will have a loop where you folded your thread.DSC01512

Put your needle through the loop and pull snugly but not too tight!  Ta da! Your thread is secure on the back with no knots or threads to weave under.  It is great for redwork because it eliminates any shadow from the threads showing on top.DSC01514DSC01515DSC01516

Bring your need back to the top of your work and continue stitching.
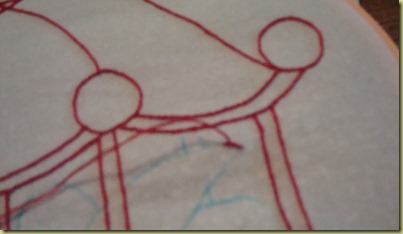
DSC01517


When I finish a thread, I weave it through several stitches and then trim the thread closely.

The ladies at the library scrutinized the back of my work and said it looked “pretty good”.  Let me tell you, that is a high compliment coming from them.  They all do excellent work!

Keep sewing!

Monday, July 19, 2010

Picture of the Day

photo

Quilt Show

While I was in Maryland our guild had its annual quilt show.  I was unable to attend but here are some pictures I took during the set up.

These are the fat quarter quilts:

DSC01429 DSC01441 - Copy   DSC01442   DSC01444 DSC01445 DSC01446 DSC01447 DSC01448  DSC01450  DSC01452DSC01451 DSC01453 DSC01454  DSC01456    Below are the challenge quilts:DSC01437 - Copy

These two (with the ribbons) were the winners:DSC01438 - Copy DSC01439 - Copy  DSC01440     DSC01432 DSC01433 DSC01434 DSC01435

The two hardest workers at the show!

DSC01459 - Copy