Tuesday, August 31, 2010

Family Reunion

Sunday we had a party on my father’s side of the family (Corradino).  About 30 people attended (and 5 generations!).  There was lots of food, laughing and reminiscing. 

Note: Family pictures ahead!

Aunt Betty and Leonard (oldest and youngest)DSC01600 

Adrienne, Michael and Leonard DSC01608

DSC01609

Frank (my brother) and ClaudiaDSC01613

  DSC01618

Frank and my cousin DonnyDSC01620

Claudia’s mom and dad (my cousins)DSC01622 

Dylan and Jeff (Lauren’s boyfriend)DSC01624

Greg (my brother) and Dick (Claudia’s grandpa)DSC01626

DSC01628

Brad and Crystal, Ella, Jacob and Celia Tangorra (cousins)DSC01632

   My family   DSC01633DSC01637 DSC01638 DSC01639 

The men of the family with Aunt BettyDSC01641

Tuesday’s Tip, August 31, 2010

Did you know…

…that if you go to your local Wal-Mart, Staples, and other school supply stops, and if you are very polite and ask nicely they will usually give you the boxes that display folders and the like?

DSC01649

This one opens at the front but sometimes they have the type that have the angled side opening.

Anyway, you can use them for your magazines:

DSC01650

I got 6 or 7 of these the last time I stocked up.  All it cost me was a little time at the store condensing the folders into other boxes to empty them.  The man at Staples thanked me for doing what he would normally have to do! This is usually a good time to check for them because school supplies are dwindling.

And by the way, if you are inundated with magazines and are planning to get rid of them, consider donating them to your local senior center.  They will usually be very appreciated.

Have a great day sewing!

Tuesday, August 24, 2010

Play Ball!

Last week my husband was on vacation so we decided to take Michael to Cooperstown to the Baseball Hall of Fame.

What a great day we had! Michael is at a perfect age to go and he was interested in it all.  He is a big Yankees fan (like his Momo!) so we spent extra time looking at all that.  We also enjoyed the halls dedicated to women and minority contributions to baseball.  At the end of the day, we even watched a game at Doubleday Field.

My camera died early on but here are some of the pictures I did take.

DSC01557  DSC01559 DSC01560 DSC01561 DSC01562 DSC01563

Tuesday’s Tip, August 24,2010

As promised here is Part 2 of my binding tutorial.

It seems as though every website I visited this week had a binding tutorial. Most of the steps are really the same; I guess great minds think alike.  All I can say is what I do works for me.

First off-two important items: an even feed food and a full bobbin (the bobbin thread should match the binding).  The even feed foot (or walking foot) keeps the layers feeding smoothly through the sewing machine.  As for the full bobbin, well, if you have ever run out with just a few inches to go….(insert favorite expletives here)

DSC01576 

I always trim and square up trim my quilt after quilting.  Some experts like to have all that extra fabric when putting on the binding.  I think it just makes for more bulk when sewing-and a full size quilt is bulky enough.  I also attach my binding to the front first.

DSC01577

After attaching the binding I go to my ironing board. (btw, you really can’t do the next steps with a polyester batting-it will melt.  I use all cotton or 80/20 cotton/poly batting)

DSC01578

Iron the binding away from the quilt.  I use alot of steam.

DSC01579

Don’t worry about the corners yet!

DSC01580

OK, after ironing, flip the quilt over.  If you have sewn a corner by hand you should know to fold the corner opposite of the way it is folded on front.  This makes for a smoother corner.  Fold the binding toward the quilt near the corner and press.  You will get a 45 degree angle.
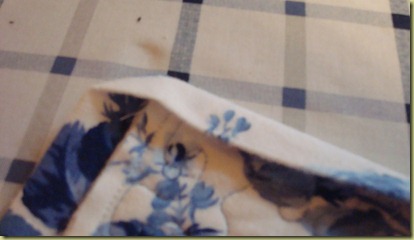
DSC01581

Then fold the other side and press.  Make sure that the binding meets up neatly at the corner.  (This step is the same as when you stitch the corner by hand. DSC01583
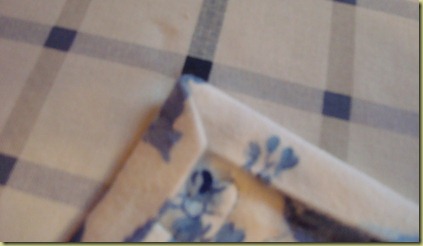
Use one of your longer, heavier pins and pin the corner.
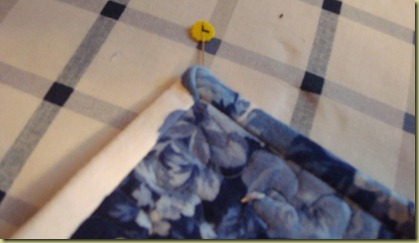
DSC01584

I do not press the binding to the back of the quilt.  I find it gets wavy and I miss spots when sewing.  That is just me; feel free to press the binding to the back.  I also do not use fusible thread or anything like that.  With practice, I have gotten better (LOTS of practice!)

DSC01585

Go back to your sewing machine.  The quilt will be right side up.  I always start right before a corner.  Your needle should be right next to the binding.  Swipe you finger under the quilt and feel that everything is straight and start sewing!  Turn your corner with the needle in the down position.

DSC01586

I sew a few inches, adjust the binding to the back, do a finger swipe and sew some more.  I do not sew very quickly,  a big quilt will take me about a half hour to sew.

DSC01587 DSC01588

This is the quilt’s corner on the back.

DSC01589

Back of the quilt.  There is a seam there!
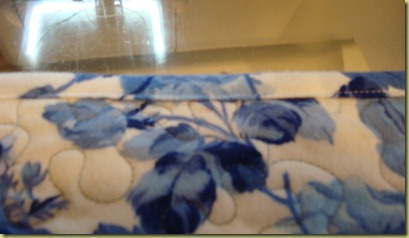
DSC01590

Front of the quilt.

DSC01591

Done!  Hey, Adrienne-come get your quilt!

DSC01592

Monday, August 23, 2010

Tomatoes and Hams!

I have my camera back.  Last Monday Katie and I got brave and decided to can tomatoes.  My husband got us a bushel of tomatoes.  My mother-in-law and I used to can 2 or 3 bushels.  I don’t remember being that energetic!

I peeled while Katie chopped and made sauce.  We got 6 quarts of sauce along with several quarts and pints of tomatoes.

DSC01546 DSC01547 DSC01548

Katie’s sauce:

DSC01549 

A good days work. 

DSC01551

Hey! Maybe we should have canned these two hams!

DSC01553 DSC01554

Monday, August 16, 2010

Tuesday’s Tip?

…will be a little late.  I am having a camera problem.  I hope to have my binding tips up very soon.  Sorry for the delay!

Sunday, August 15, 2010

For Lauren

Remember Buddy?

DSC01545

(17th attempt at a picture)

Does he look like a destructive dog?

DSC01534

This is his monkey.  Note the missing arms, legs, and tail,  and partial right ear.

Yes, Buddy.  We still love you.

Look!

I am very excited!

Although I have been knitting for 50 years (my grandma taught me to knit and crochet early on) I am not a confident knitter.

Elvie, an expert knitter at the shop, picked out a pattern and directed me to this gorgeous yarn and I am working on this:

DSC01532

How does the yarn know when to change colors?????

For those of you that are not knitters, this type of knitting is called Entrelac.  It is much easier to do than to explain.  Each section is knitted separately yet everything is still on the needles together (I told you-clear as mud).  On my second start I got the rhythm and everything seemed to click.

I will keep you updated on my progress.

A New Sample

One of the pleasures of working at the quilt shop is the opportunity to try out patterns and make samples.  Here is a topper that I made last week:DSC01530

I can’t remember the last time I worked with 60 degree triangles and I was nervous about the binding but I was able to finish this up in just a few hours.  It is a pattern by Atkinson Designs-she also made up the Yellow Brick Road pattern.

Wednesday, August 11, 2010

One Month Old!

Posted by Picasa

Monday, August 9, 2010

Tuesday’s Tip August 10,2010

Here are a couple of tips to help you make a nice straight binding.  I know that many of you may do this but this is for those who are new to making a straight grain binding.

I cut my strips at 2 1/2” because I I attach the whole binding by machine.  No handwork for me! (OK-not totally true-some times I sew the binding to the back by hand-but not very often).

I used to think that I was saving fabric by butting my edges together exactly. (See below) But I think that is why my seams were never straight.

DSC01526

Now I use my cutting board and start like this:

DSC01345

By overlapping a bit, I find it is easier to visualize a start point and stop point for my drawn line.

I use my little ruler to mark my sewing line; the bias marking on the ruler is lined up at the bottom so I know I have a true 45 degree angle. Mark your sewing line.

DSC01346


DSC01347

(blurry-sorry)

OK-this is important. Check to make sure the line you drew is going the right way.  There is nothing worse that sewing 10 binding strips together the wrong way.DSC01348

Sew the seam.

DSC01527 

Trim the seam to 1/4” and trim the dog ears (the picture below shows one dog ear cut off)

DSC01528

And you are done! A nice straight binding.

DSC01529

Next week I will show you how I do the whole binding by machine.

Tuesday, August 3, 2010

Tuesday’s Tip August 1, 21010

August already!

I am working on a wall hanging for my sister-in-law.  It is from a series of patterns depicting kitties as food.  This one is The Stalker (for celery).

DSC01522

When I do machine applique I was taught to pull up my bobbin thread at the start, sew my seam, pull a long tail and cut the threads.  Then I pull the threads to the back and secure them.

Tedious yes but it makes for a neat finish and is still faster than hand applique.

DSC01523

I use these to pull my threads to the back.

DSC01525

They are self-threading needles.  What a time saver! I can thread two or three threads at a time. The tops of the needles have an opening; the thread slides through and is secure. I found these on the notions wall at Jo-Ann’s and the case is magnetic.I love it! They stick on the lamp attached to my cutting area so I always know where they are.

A caveat- I do not like them for regular hand sewing.  They are kind of thick and not as sharp as regular sharps. Maybe some other brands are better.  But for this type of work they are perfect.

Happy sewing!